A Cloud VPS Server package is an excellent alternative if you want scalable and flexible web hosting. Setting up a VPS platform, on the other hand, might be difficult for newcomers who are inexperienced with a command line interface.
This article will show how to use a command line interface (CLI) to set up a Cloud VPS Server with IT Company and why it is necessary.
Understanding VPS Configuration
A shared hosting package includes the provider setting up the server and its software, including the management panel. You may configure the hosting account but not the host server parameters.
Virtual private servers, on the other hand, allow you greater flexibility. A VPS allows you to install and configure your favorite hosting control panel. The VPS provider will just set up the virtualization and web server technology, such as LiteSpeed or Apache.
Setting up a virtual private server takes longer since users must select and install the control panel or software themselves. Users who go from shared hosting to VPS must learn server management chores such as establishing a virtual operating system.
Using tools such as PuTTY, developers typically interface with a virtual private server using the secure shell (SSH) network protocol. It enables them to connect to the server remotely, transfer data, and perform instructions, resulting in a more efficient workflow.
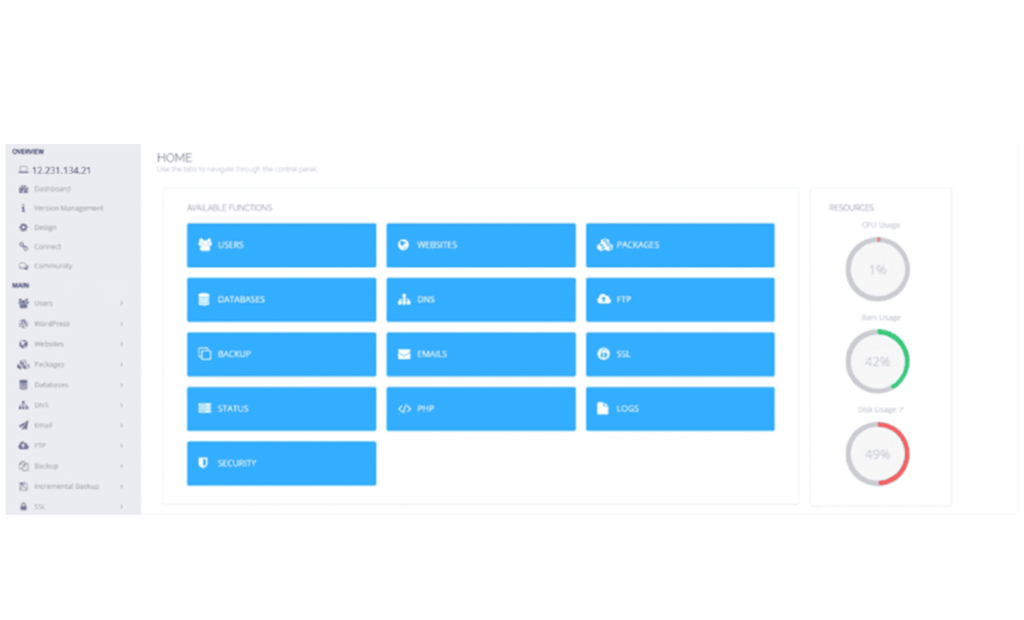
For easier server administration, install a VPS control panel with a graphical user interface (GUI). It is recommended for novices who are unfamiliar with coding and CLI apps.
How to Set Up a Cloud Server VPS in 6 Steps
There are six actions you must do to guarantee your Cloud VPS Server is safe and performing efficiently. If this is your first time using a CLI, read our Linux command tutorial first.
1. Purchase a Cloud VPS Server Hosting Plan
IT Company provides a comprehensive hosting package at just $38.35 per month, offering you the following benefits:
- Free SSL Certificate ✅
- Free Upgrades Anytime ✅
- Free Setup ✅
- 40 GB of SSD Storage
- 1 GB Guaranteed RAM
- Monthly Data Transfer Included
- 7-Day Money Back Guarantee ✅
Our all-inclusive hosting plan ensures top-notch security and performance for your website. No need to worry about hidden fees or upgrades – everything you need is right here.
2. Log Into Your VPS Using Secure Shell (SSH)
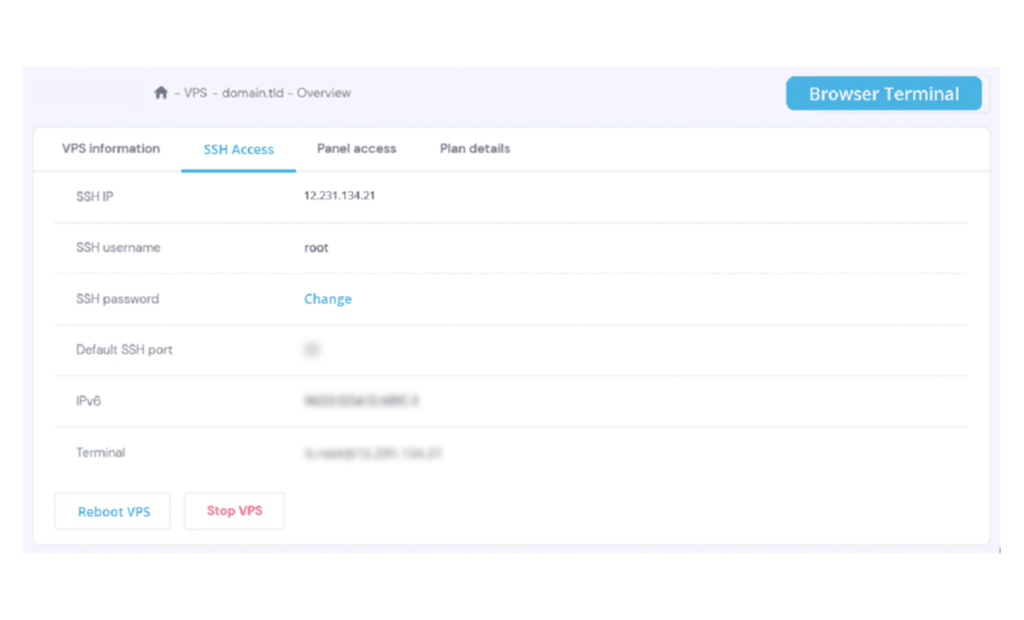
Navigate to Overview SSH access from the VPS management menu to locate your server IP address, default SSH port, and root login credentials. All of this information is used to establish a secure connection to your server using the SSH service.
In macOS or Linux, you may also use Terminal to connect. To login to your VPS, enter the root password after executing the command in the Terminal.
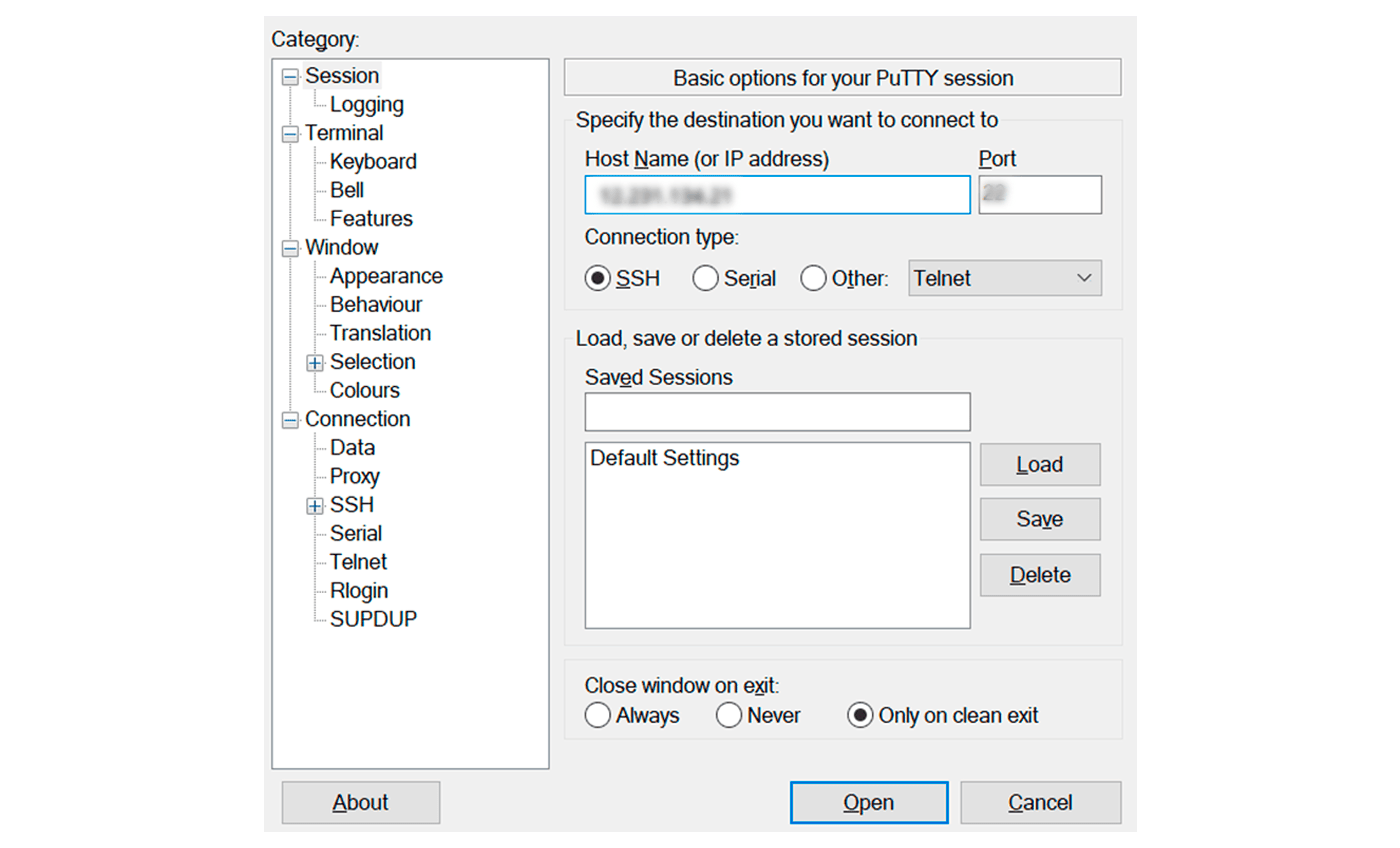
Use an SSH client like PuTTY for Windows users. To connect to your server after installing it, follow these instructions.
- Launch PuTTY.
- Make a note of your server’s IP address and SSH port. The SSH port number is 22 by default.
- Paste them into the respective fields. Click Open to proceed.
- Enter the root login and password for your VPS. The password will not shown when you input it for security reasons.
Execute instructions in the new line after connecting to your VPS to configure its settings. In the command line, type help to get a list of possible SSH commands.
3. Update Your Cloud Server VPS
Using outdated software may expose your server to security risks and endanger the data of your site visitors. In addition to improving security, upgrading your VPS guarantees you get the most recent features and performance enhancements.
To update your virtual private server, use the following commands to check for and install all available updates for your server:
Depending on the amount of updates, patch size, and internet connection, the procedure might take hours. Once the update is complete, use the reboot command to restart your VPS and rejoin using the SSH service.
Rebooting is essential to guarantee that all updates are properly implemented. Otherwise, outdated software may continue to function in the background, preventing the upgrades from taking effect.
4. Add a New User and Change Privileges
Adding new SSH users with varying levels of access allows for cooperation and provides you greater control over VPS administration.
Giving root user rights only may expose your server to mismanagement and problems. Accounts with superuser privileges have complete access to and control over the server. As a result, committing errors with a root account might have catastrophic consequences.
Creating a regular account with superuser access helps to reduce risks since executing a command with full administrative capabilities needs the sudo prefix, for example:
To avoid inadvertent command executions, your VPS will need administrator login credentials in addition to sudo.
Connect to the server’s root user account and run the following command to establish a new user account. Replace username with the name you choose for your account:

Then, using this command, add the new user to the sudo group in order to provide administrative access. Replace username with the user in question:
- sudo usermod -aG
Finally, create a new password for the user. Use these login credentials to connect to the VPS via an SSH client or Terminal. Rep this step to add extra SSH users to your VPS.
5. Enable Public Key Authentication
The use of a public-private key combination to protect your SSH connection is known as public key authentication. This strategy increases VPS security since it is harder to decipher and safer than regular passwords.
The public key is stored on your server, and it will be used to authenticate the private key. Only authorized users, such as the system administrator, have access to the private key. A passcode is required in addition to the private key to log in.
Depending on your VPS operating system and SSH client, the methods for establishing public key authentication may differ. Because we’re using Windows, check out our tutorial on setting up SSH keys in Linux and macOS.
Otherwise, follow these steps to generate SSH keys with PuTTYgen, which should be included with PuTTY:
- Launch the PuTTYgen application.
- Configure the parameters, such as key type and bit size. In this lesson, we will utilize the default settings. Then press the Generate button.
- Wait for PuTTYgen to generate the keys. Move your mouse around to randomize the key pair.
- Enter the key passphrase, which acts as a password for the key pair.
- To save the key to your computer, click Save private key.
Keep PuTTYgen open since we will be moving the public key to your VPS. Before continuing, make sure you have the Nano text editor installed. Then, connect with PuTTY as root and proceed as follows:
To switch to your new account, run the following command. Replace username with the username of your account.
su – user name
Run the following commands to create a new folder for the public key, limit its permissions, and open the authorized_key file using Nano. mkdir /.ssh
chmod 700 /.sshnano /.ssh/authorized_key
When the Nano text editor appears, paste your PuTTYGen public key.
Change the file's permissions with the following command.
chmod 600 /.ssh/authorized_keys
Return to the server's root user to finish the procedure.
exit
nano /.ssh/authorized_key
When the Nano text editor appears, paste your PuTTYGen public key.
Change the file's permissions with the following command.
chmod 600 /.ssh/authorized_keys
Return to the server's root user to finish the procedure.
exit
- Now, alter your SSH client settings to utilize your private key for SSH connection authentication:
- Navigate to Connection SSH Auth from the main menu of PuTTY. Click the Browse button in the Private key file for authentication area.
- Select the private key file you saved earlier and choose Ok.
- Once the key pair is set, disable your VPS account’s password authentication mechanism for the new user: sudo nano /etc/ssh/sshd_config It will open the sshd_config file using the Nano text editor.
- Find the PasswordAuthentication line, erase the # sign before it, and change the Yes value to No. To restart your VPS, close the text editor and type reboot.
6. Configure Firewall for Your Cloud VPS
Users must actively configure security protections for their virtual private server, unlike shared hosting services. Some web hosting companies use server-level security precautions, but you may still require additional safeguards.
Configuring a firewall is one method for securing your virtual private server. A firewall allows you to set a rule to automatically filter incoming and outgoing server traffic.
We recommend installing the iptables firewall. Because the firewall configuration procedure entails several stages and instructions. Unless you wish to add more rules, you only need to configure it once.
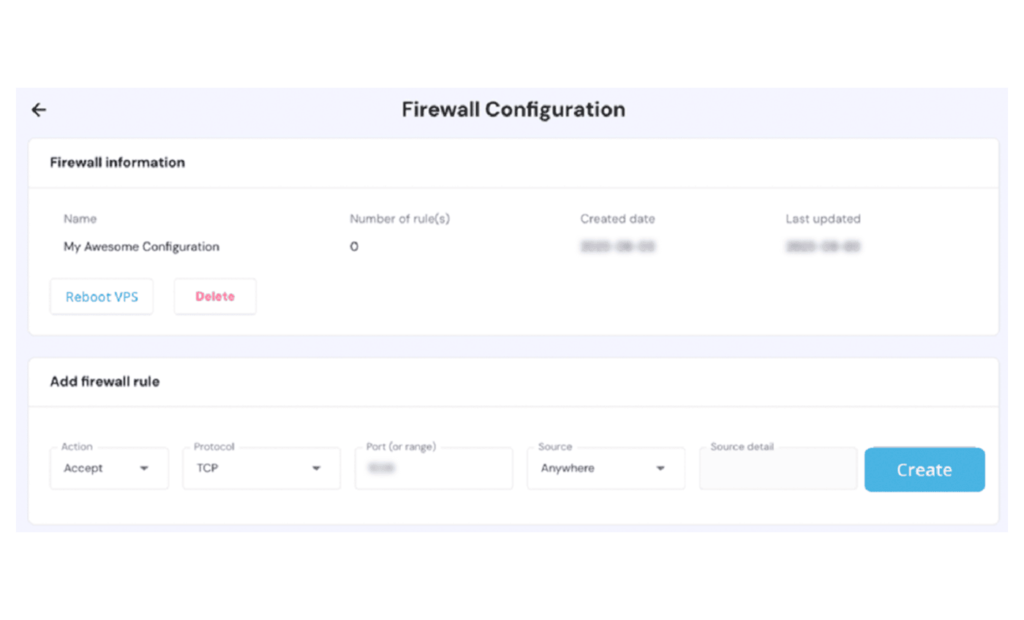
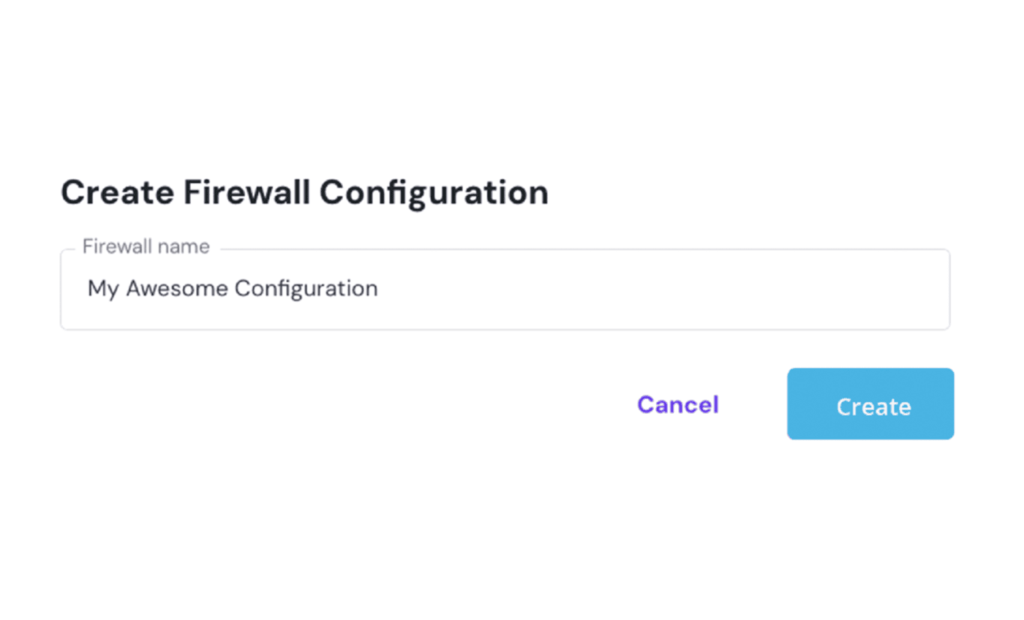
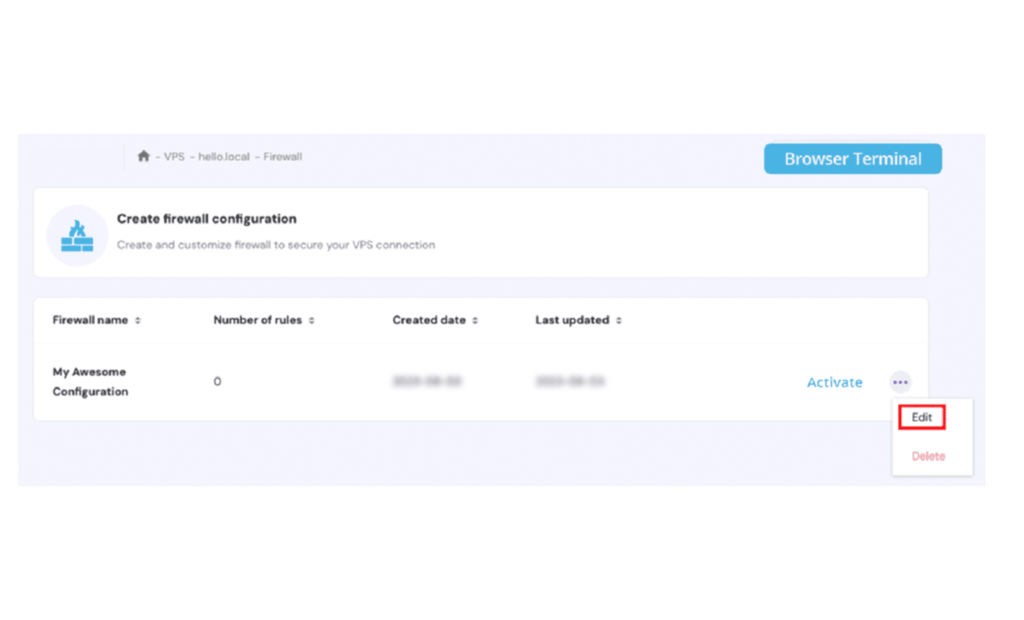
You may also use our integrated IT Company VPS Firewall. Begin by selecting your VPS and going to the Firewall section:
Conclusion
Installing CyberPanel allows you to begin hosting a website on a Cloud VPS Server. However, you must first add a domain and establish the SSL certificate. Then, either import your website file or install WordPress to start from scratch. This CyberPanel also has capabilities like Git integration and API access to help with web development activities.
Finally, our IT Company is ready to take your internet presence to new heights. Our Cloud VPS Server plans start at $38.35 per month and include a variety of features such as a free SSL certificate, flexible upgrades, fast SSD storage, and the certainty of a 7-day money-back guarantee. It’s time to take your web hosting experience to the next level and embrace the future with us. Join our delighted clientele today. Our first priority is your success!